How to use continuous integration for Cordova application using Microsoft Team Foundation Server
Continuous Integration is software development practice where many developers collaborate on complex software projects, every day usually each developer do many code changes in different project files and it can be a long and unpredictable process to integrate all parts of code together.
Continuous integration (CI) is the process of integrating your code into a shared repository as frequently as possible. During code integration, a build break or a test failure can inform you, in a timely manner, of an error in your code.
Martin Fowler has the following breakdown of practices for continuous integration:
- Maintain a single source repository.
- Automate the build.
- Make your build self-sustaining.
- Check in at least once a day.
- Build each check-in on the CI server.
- Keep the build fast.
- Test in a clone of the production environment.
- Make it easy for anyone to get the most recent executable.
- Always be aware of what is happening.
- Automate deployment.
This tutorial will cover how to build continuous integration for Cordova application using Microsoft Team Foundation Server.
 |
| Build Cordova application workflow |
- Project setup for CI.
- Get a latest code from git repository.
- Build Android apk file using Cordova.
- Sign Android apk file using private keystore.
- Publish Android apk file.
Project setup for CI
Installing extension
To build Cordova application on Team Foundation Server, we need to add extension from visual studio Marketplace - Cordova Extension
Create build definition
- Open your team project in web browser. https://{your_account}.visualstudio.com/DefaultCollection/{your_team_project}
3. Select Empty build definition.
Build Android apk file using Cordova
1. On empty build definition,
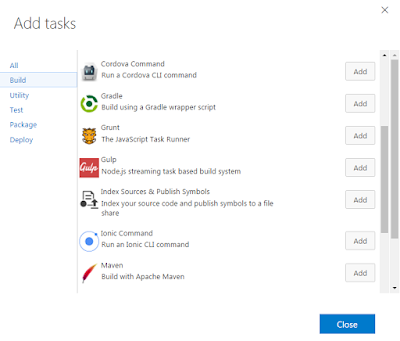
click on "Add build step..." >> Add "Cordova Command".
(Note: If you have installed above mentioned plugin, then only you will able to see this option).
2. To build Android apk using Cordova CLI , we need to add parameters as shown below.
- Pull latest code from Git repository.
- Run Cordova build command for android platform
- Cordova build --release android.
- Don't forgot to mention Working Directory path (project git repository path).
After running above build definition, Cordova will build release version of android apk file in your project directory -
{Project Name}\platforms\android\build\outputs\apk\android-release-unsigned.apk
{Project Name}\platforms\android\build\outputs\apk\android-release-unsigned.apk
Now next step is we need to copy this generated apk file in to another folder. (This is optional step)
3. From build step add "Command Line".
Above configuration will run simple copy command.
cmd copy source-file-name destination-file-name
By using this step we can rename generated apk file (android-release-unsigned.apk) to meaningful name.
Sign Android apk file using private keystore
- APK Files: Path of generated Android apk file.
- Jarsigner Options:
- Keystore File: Keystore file path from git repository, assuming that keystore file is already been added in git repository.
- Keystore Password: Password of keystore. Password should be encrypted, we can use secrete variables from TFS - BuildDefinationVariables
- Alias: Name of the alias.
Now save and run above build definition. Sign apk file will get build in the same location.
But still you can't access this signed apk file, because all this build definition are running over the server pool.
To publish/ use this apk file we need to do checked-in to back to git repository.
Publish Android apk file
To publish/use generated android apk file, we need to do check-in to git repository, hence now we are going to use same Command Line tool to run the required git commands.
Now enable continuous integration for all above build task.
On every check-in, this build definition will get trigger and new release version of sign apk file will get build automatically.


No comments:
Post a Comment